


Following this guide, you will discover how to add more storage to a Firestick or Fire TV running Fire OS 7. This includes, but is not limited to, Fire TV Stick Lite, Fire TV Stick 3rd Gen, Fire TV Stick 4K Max, and Fire TV Cube 2nd Gen.
The Amazon Firestick is a popular streaming device that offers excellent value for money and can be jailbroken with minimal effort. It is a perfect choice for anyone looking to cut the cord, regardless of their experience with streaming devices.
However, just like any other streaming device, you must maintain your Firestick correctly to avoid issues. For instance, running out of storage is one such issue. But what can you do if you need more space? Adding an external USB storage device to your Firestick for more storage is entirely possible. See the videos for full details, or follow the written instructions below instead.
To add external USB storage to any Firestick or Fire TV, you must first prepare a few things.
If you are unsure or have not yet prepared these four things, read my guide on How to Increase Firestick Storage. Then, when you are ready to begin, return to this post.
Any Firestick or Fire TV running Fire OS 7 can use any type of storage. In other words, you can attach and use USB storage for general, system or mixed storage.
Refer to How to Increase Firestick Storage for more information on these different types of storage.
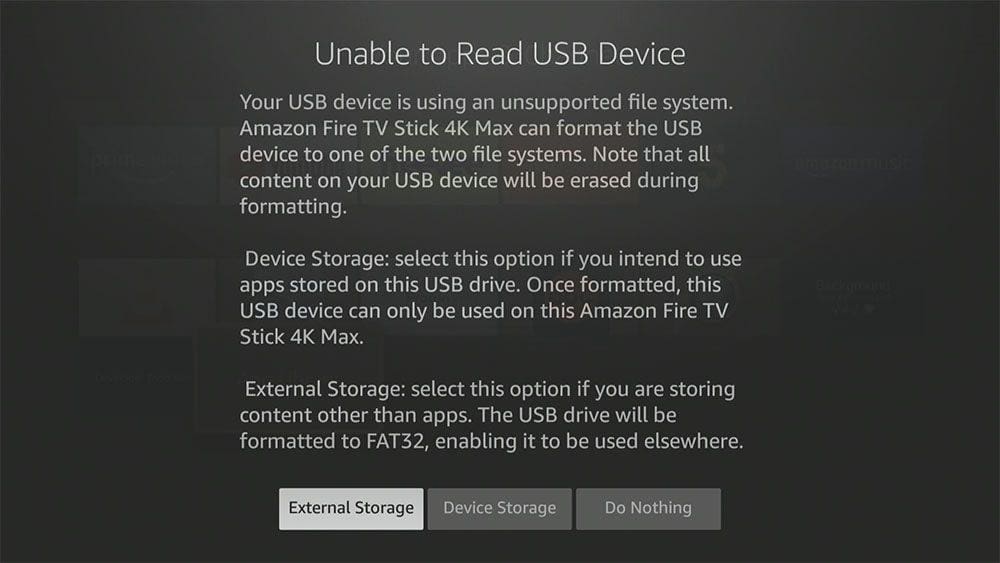
To use the USB storage as general storage, all you need to do is connect it. The system will handle everything for you. A menu will pop up, offering you a choice. Use the storage as External Storage (general storage) or Device Storage (system storage) to install more apps.
You’ll be able to monitor how much of the storage space on the USB drive you’re using by going into the Firestick Settings.
There are several reasons why general storage can be helpful, including:
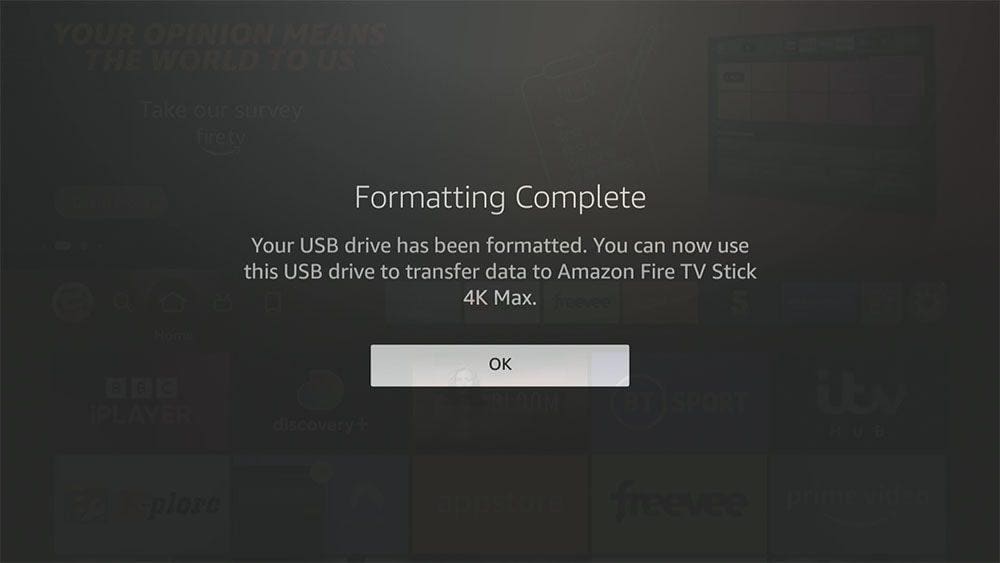
Fire TV devices running Fire OS 7 recognise additional storage once you connect it. The system will handle formatting and partitioning of the USB storage for you. When you connect the USB storage, a menu will pop up, offering you a choice. Use the storage as External Storage (general storage) or Device Storage (system storage) to install more apps.
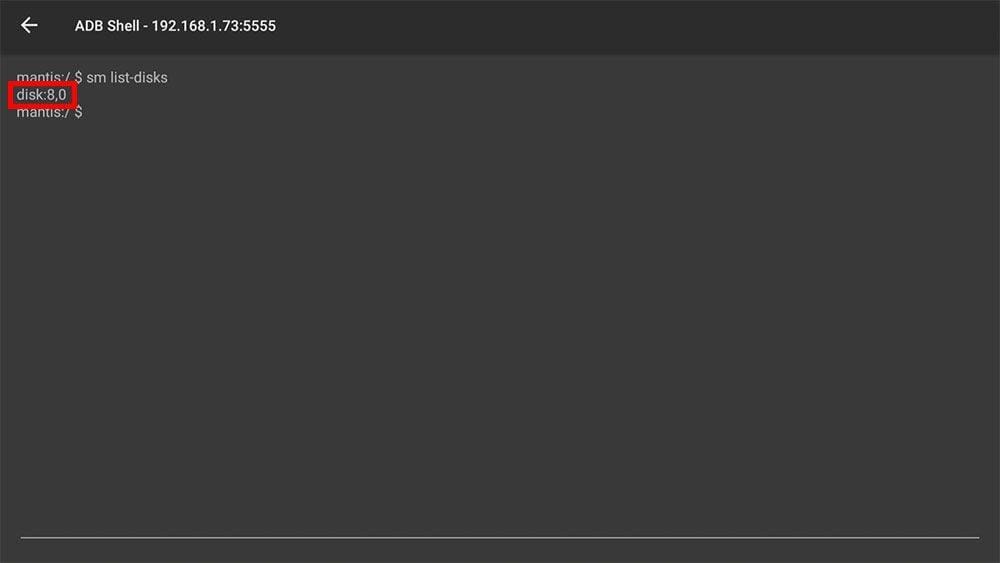
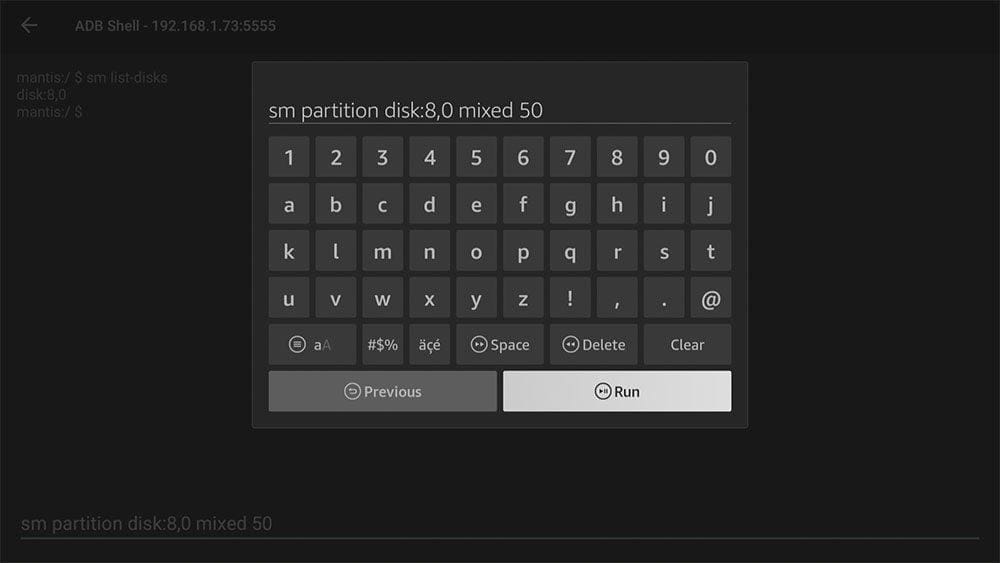
The system does not automatically support if you want to use USB storage as mixed storage. However, you can achieve this manually by entering a line of code. This code creates two partitions on the USB storage that allow part of it to be used as system storage and part as general storage. You can then install applications to the USB storage, and you’ll still be able to use and access part of the storage for sharing and accessing files. There are quite a few steps to this, but it shouldn’t take longer than 10 minutes, depending on your experience.
This guide will teach you how to do automatic formatting for all system storage and manual formatting for mixed storage. Continue to add more storage to your Fire OS 7 Firestick or Fire TV by following the step-by-step video tutorial. Or, if you’d prefer, follow the written instructions below instead.
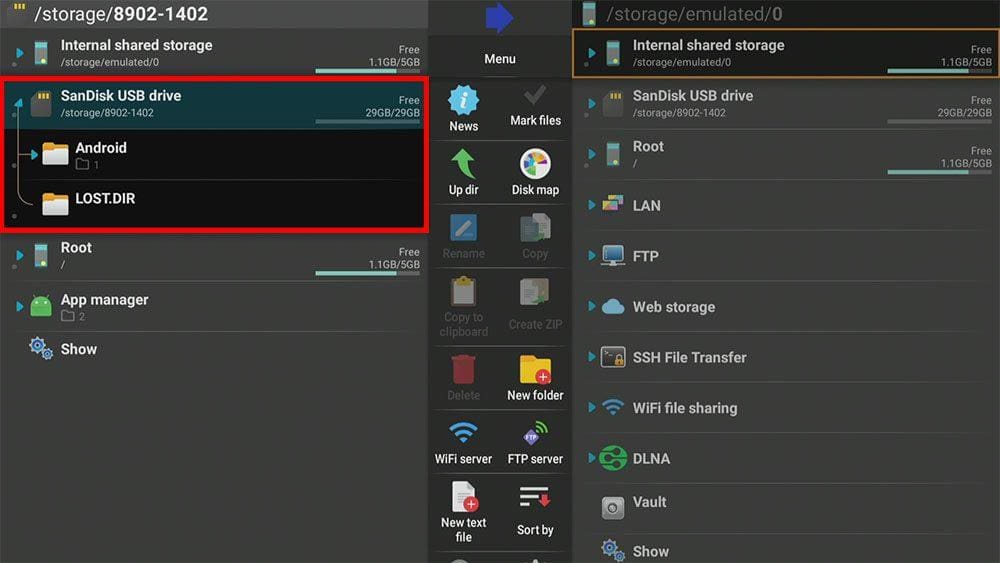
Once storage is formatted to additional device storage, you’ll no longer have access to the USB drive. You won’t be able to see and use it with a file explorer app such as X-plore, for example.
You can now use the USB storage to install more apps and most apps installed from here on will be installed on the USB drive.
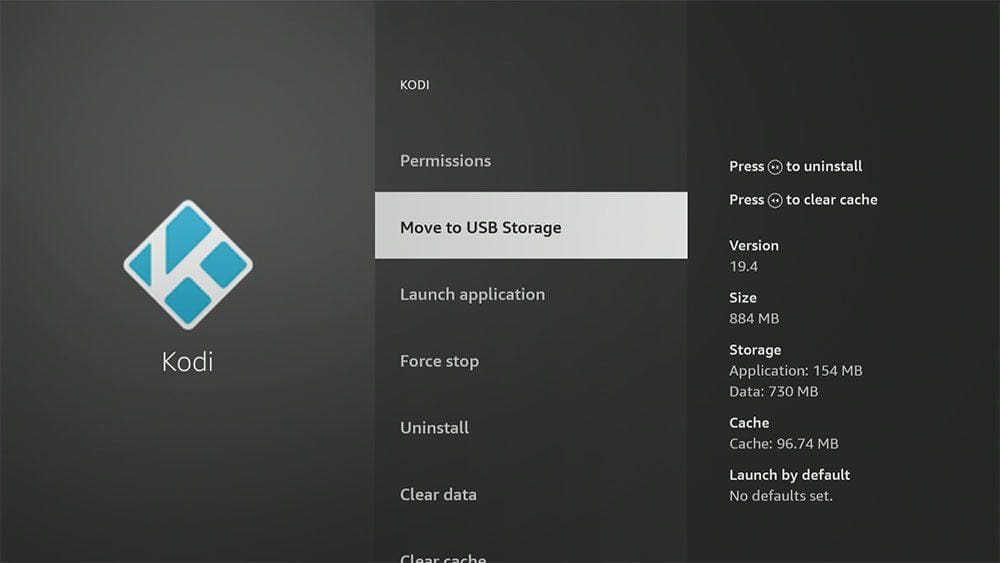
If an application does not install to the USB storage, you can assume that the application developer has not set the permission. However, moving the app to USB storage is possible.
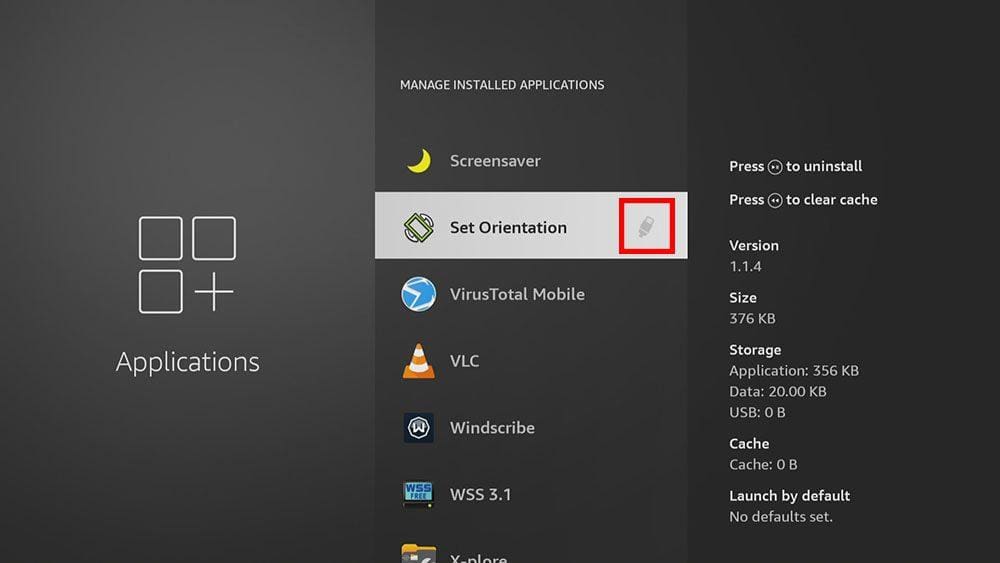
Once you’ve moved an app to the USB storage, you’ll have the option to move it back to the internal storage.
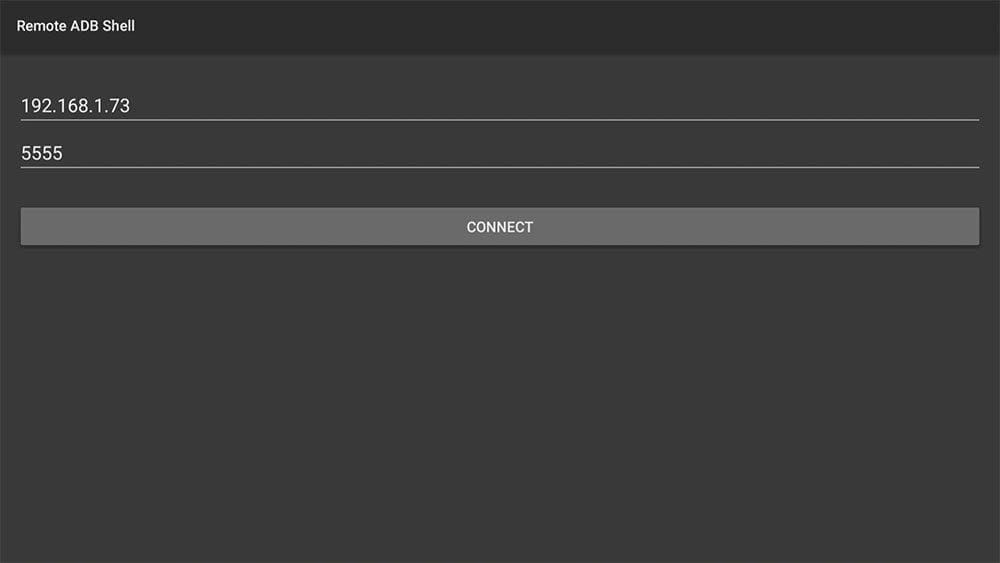
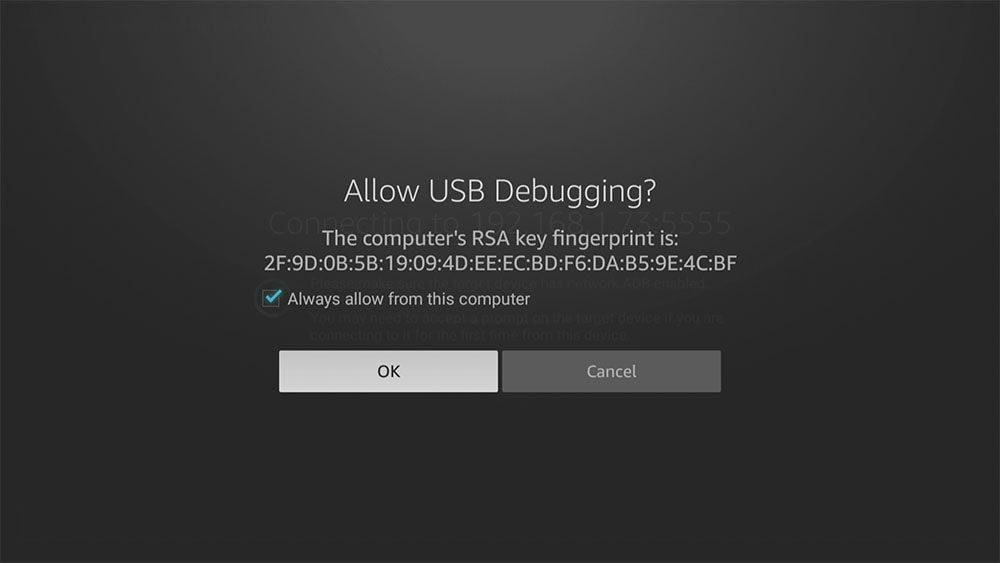
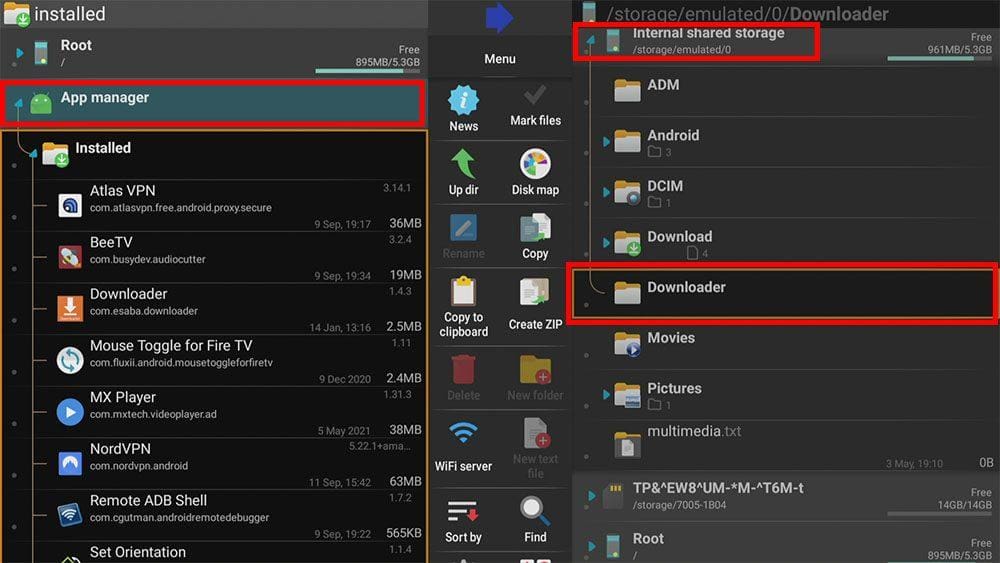
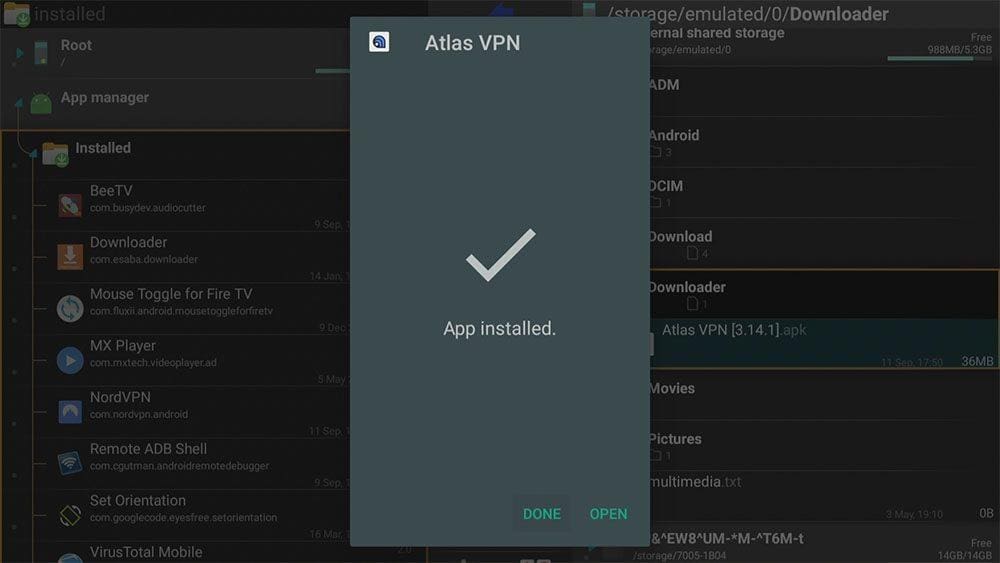
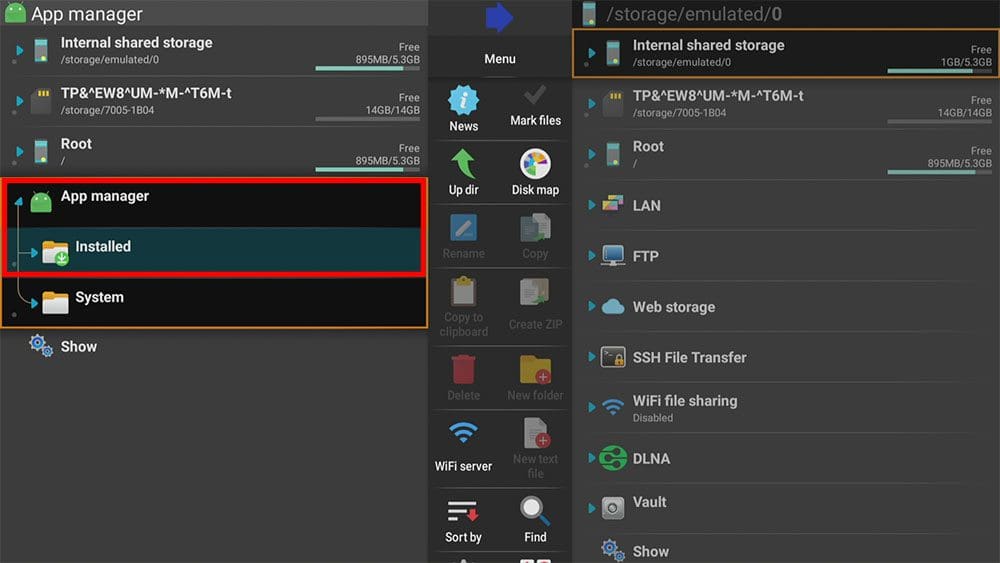
To input a line of code, an application called Remote ADB Shell is required. However, this app is not available on the Amazon App Store. It must therefore be sideloaded using the Downloader app.
Use Remote ADB Shell to connect to the ADB Shell service of the Firestick to execute a terminal command.
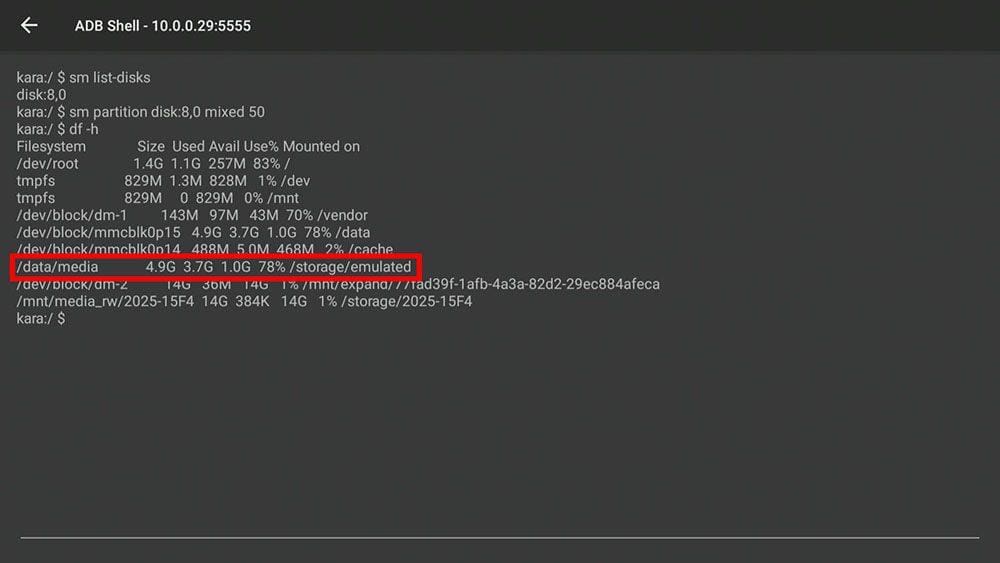
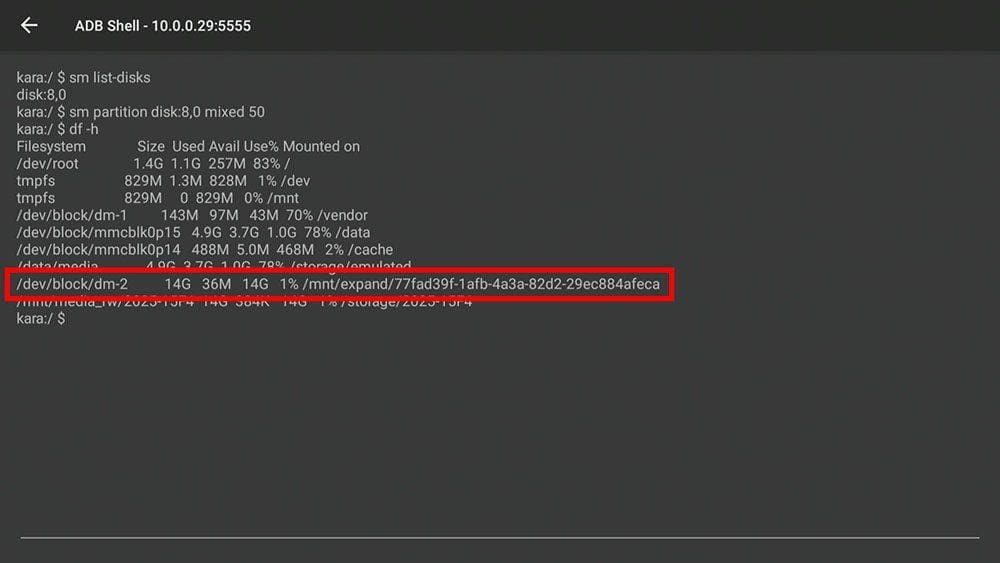
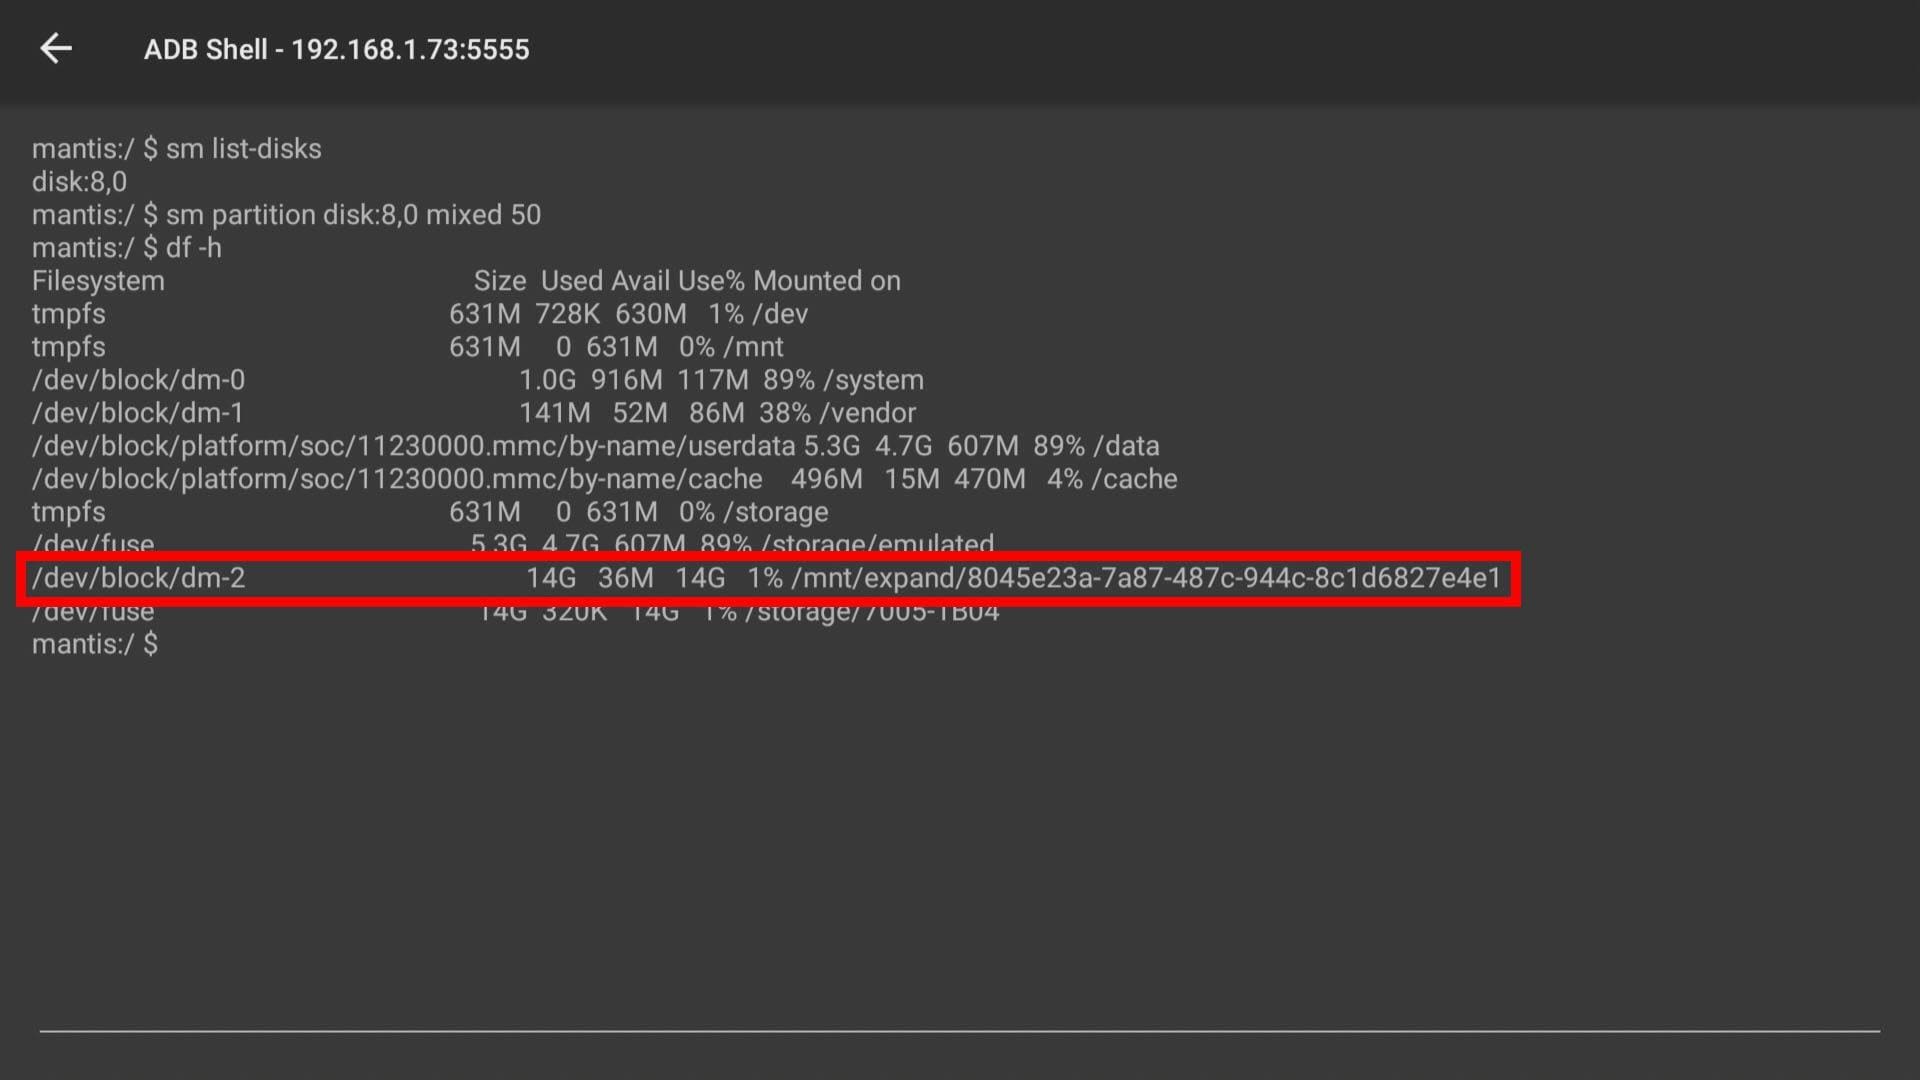
Run the disk-free command to show total space available, space used and all available disk space for all currently mounted partitions.
The first line /data/media 4.9G 3.7G 1.0G 78% /storage/emulated
refers to the Firestick internal storage. The numbers on your screen will be different to show how the internal storage is used on your device. In my example:
4.9G = total useable storage
3.7G = storage being used
1.0G = storage remaining
78% = percentage of storage being used
The second line /dev/block/dm-2 14G 36M 14G 1% /mnt/expand/ (followed by a list of letters and numbers, this is the partition identification number)
refers to the part of the USB storage allocated as system storage. The numbers on your screen will be different to show how the internal storage is used on your device. In my example:
14G = total useable storage
36M = storage being used
14G = storage remaining
1% = percentage of storage being used
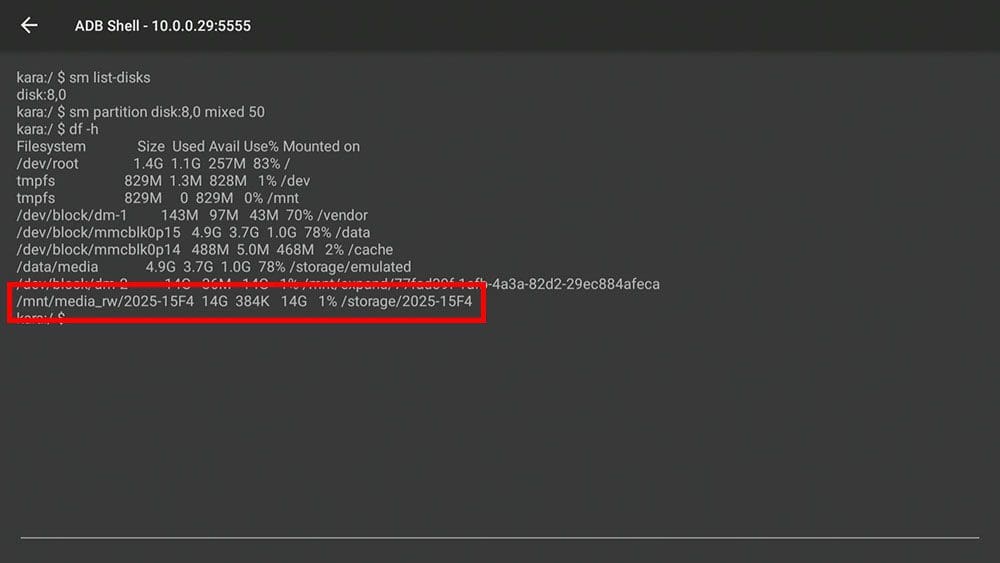
The third line /mnt/media_rw/2025-15F4 14G 384K 14G 1% /storage/ (2025-15F4, this is the partition identification number)
refers to the part of the USB storage allocated as general storage. The numbers on your screen will be different to show how the internal storage is used on your device. In my example:
14G = total useable storage
384K = storage being used
14G = storage remaining
1% = percentage of storage being used
Most apps installed from here on will be installed to the part of the USB storage drive partitioned as system storage.
If an application does not install to the USB storage, you can assume that the application developer has not set the permission. However, moving the app to USB storage is possible.
But, as the additional system storage has not been added via the system, you cannot use the system to move apps to the external storage. It must be done manually.
You might be able to move an application manually to the USB storage if it did not install there by default. Moving an application can be done in one of two ways.
Application data refers to but is not limited to: usernames, passwords, settings and favourites.
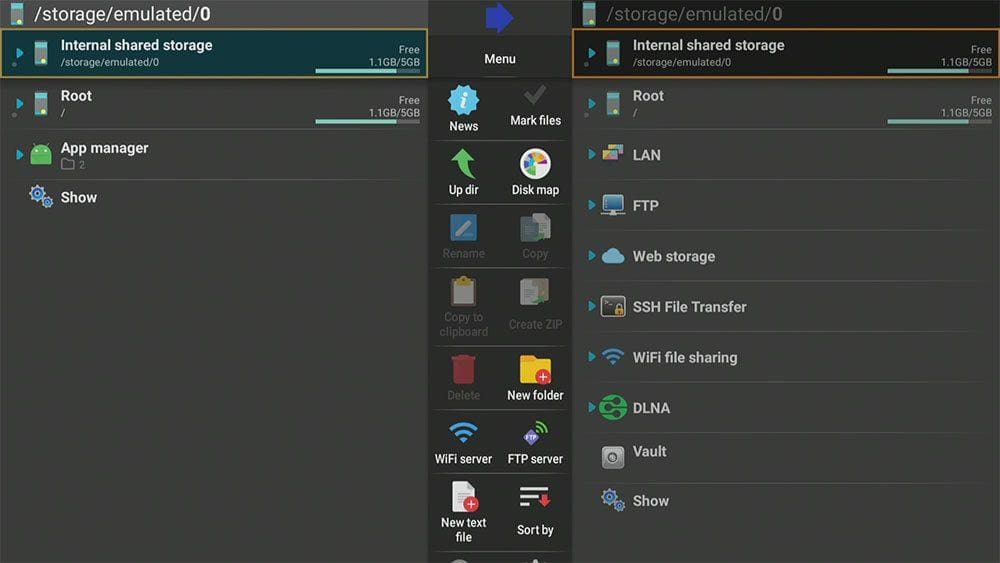
Applications can be manually moved to the USB storage using a file explorer application. This guide uses X-plore. Follow along with the step-by-step video tutorial. Or, if you’d prefer, follow the written instructions below instead.
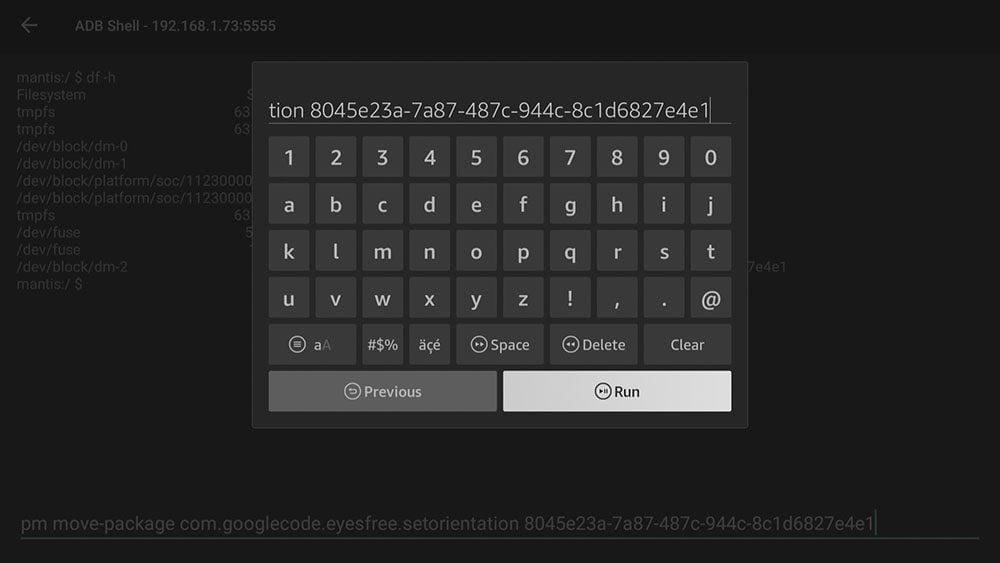
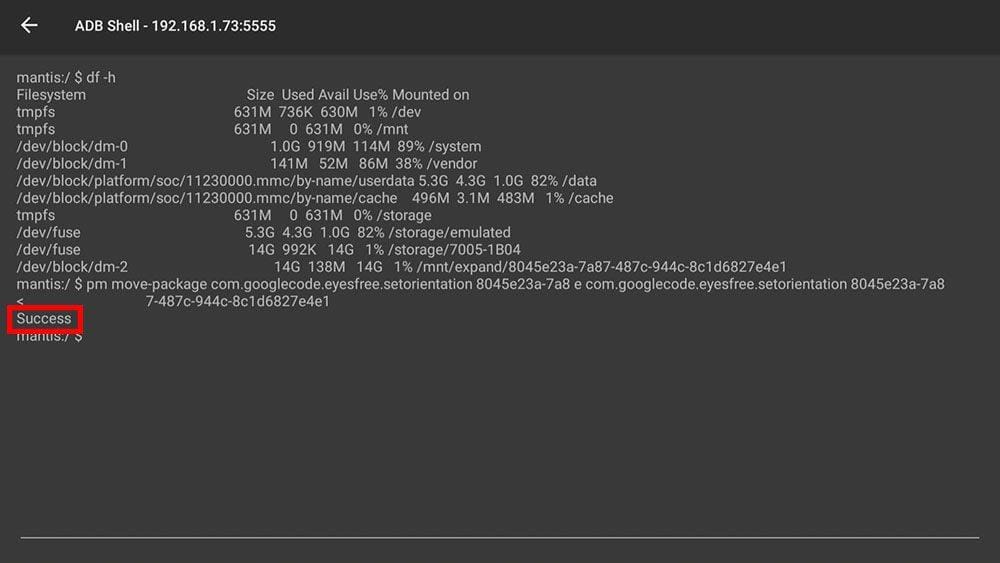
Moving an application to the USB storage whilst keeping the application data requires an ADB command. The command uses the app’s package name and the partition identification number of the USB storage drive allocated to system storage.
Follow along with the step-by-step video tutorial. Or, if you’d prefer, follow the written instructions below instead.
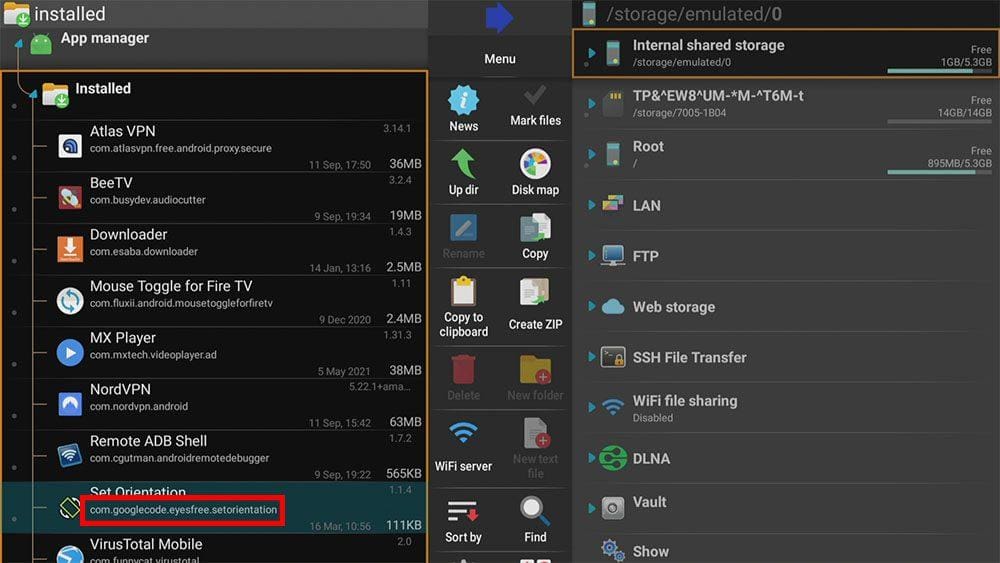
You can find the correct package name using the X-plore application. If you do not already have X-plore installed, then continue with the following steps to install it. If you do have X-plore installed, skip ahead to step 9.
Find and note the partition ID allocated to additional USB system storage.
In this example, to move the Set Orientation app, I have entered:
pm move-package com.googlecode.eyesfree.setorientation 8045e23a-7a87-487c-944c-8c1d6827e4e1
This guide taught you how to add more storage to your Firestick or Fire TV. You also learnt how to manually add more storage for mixed USB storage using Remote ADB Shell to input commands, partition the USB storage and move applications. If you need further help or have questions, select one of the following options.
PROGRESS: