If you are encountering issues with Kodi where it is unable to connect, don’t worry – this guide can help fix it. I have compiled a list of three simple solutions that can help you quickly and easily resolve this problem. By following these fixes, you can enjoy your media on Kodi without any interruptions or errors.
Kodi can be installed on almost any device, e.g. Firestick, Fire Cube, Nvidia Shield, Android box, Chromecast, phones, tablets, PC and more. This guide uses a Fire TV Stick 4K MAX. However, the steps are similar on other devices, too.
Table of Contents
Why Does the 'Unable to Connect' Error Appear?
As a seasoned Kodi user, you might have encountered an error message while installing a Kodi addon or build.
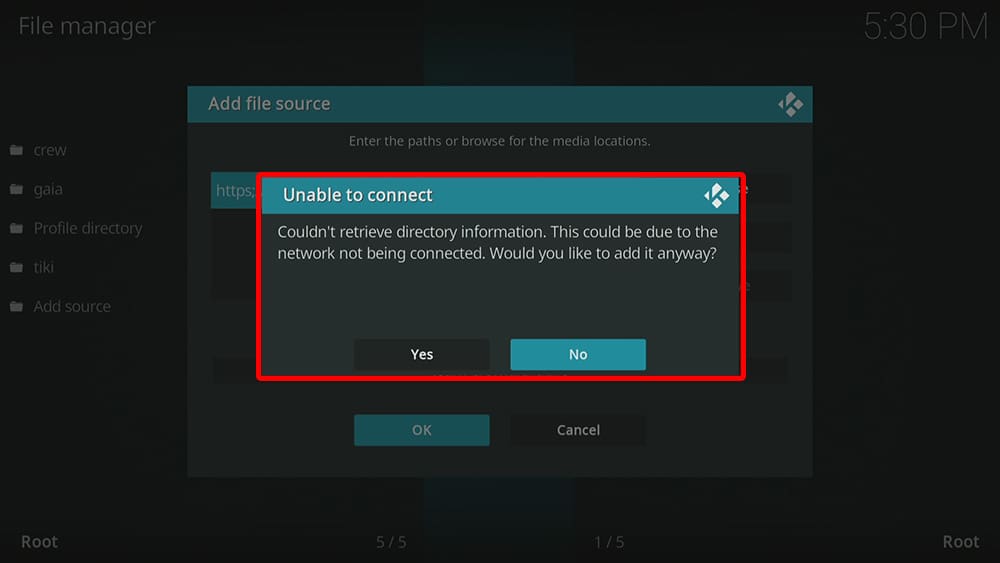
This error message pops up when you attempt to install a Repository URL that’s not part of the official Kodi repository. The error message reads: “Couldn’t retrieve directory information. This could be due to the network not being connected. Would you like to add it anyway?”
This error, a common nuisance for many Kodi users, can be resolved with straightforward solutions that can be implemented in a minute or less.
This guide offers four universal methods for resolving the Kodi Unable to Connect error message on any device, be it Amazon Firestick, Fire TV, Android TV/Google TV Boxes, PC, mobile phones/tablets, and more.
How to Fix Kodi Unable to Connect Error
1. Check your URL
If you encounter a Kodi Unable to Connect error, it is most likely due to an incorrectly typed URL. Here are the steps you can take to resolve the issue:
- When the Unable to Connect error appears, click the No button.
- Next, it’s important to be meticulous in reviewing the URL information you’ve entered. Even the tiniest errors can lead to the Unable to Connect error. So, take your time and ensure there are no mistakes in the URL.
- If you do spot an error in the URL, don’t panic. Simply delete the incorrect URL and retype it correctly. This straightforward action can often resolve the Unable to Connect error.
- Once you are confident that the URL has been entered correctly, click the OK button to add the URL/file source as usual.
If the Unable to Connect error persists and is unresolved, don’t worry, there’s more help available. You can follow the guide to fix number 2.
2. Check the URL is Not Down
As many Kodi users know, addons and repositories constantly change, making it difficult to determine whether the host URL is functional.
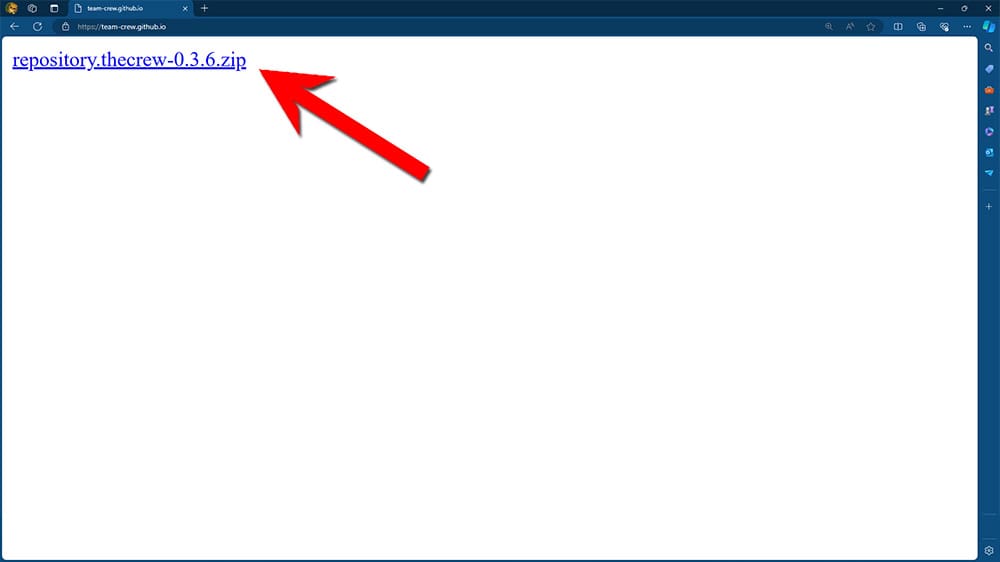
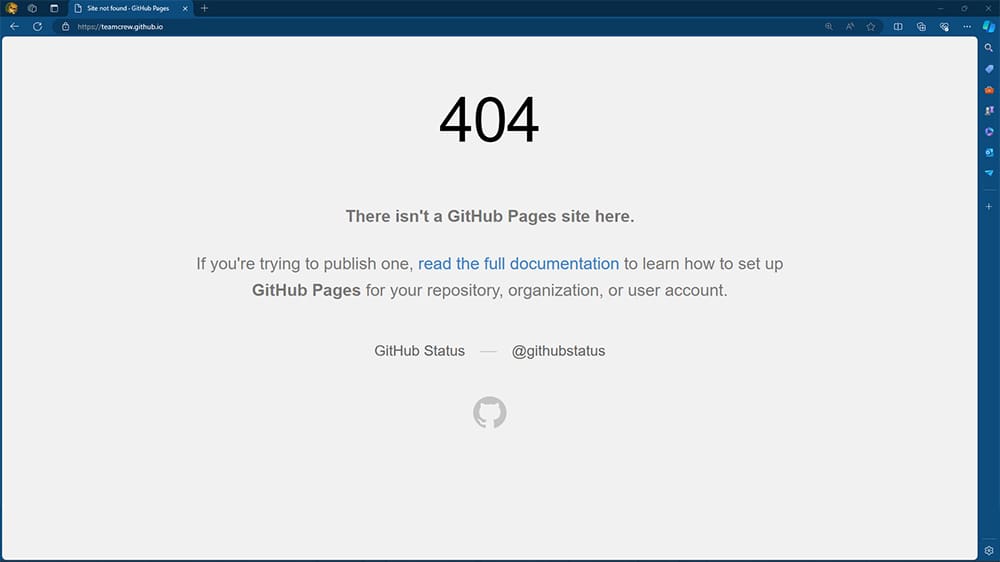
If you have ensured that the URL is typed correctly, it may be that the file you are trying to install is no longer operational. However, you can quickly confirm availability by typing the URL into any web browser.
After typing the URL into your browser, you will see one of two outcomes.
If the URL is functional, an index of messages or a clickable .zip file will be displayed.
If you happen to have this issue, don’t worry. There are always other options available. You can install another addon of your choice or use the Best Kodi Movie & TV Addons guide, which features all the top addons and is updated on a weekly basis. For those trying to install a Kodi build, we suggest using the Best Kodi Builds Page.
3. Check your Internet Connection
Whether using a Firestick, Fire TV, Android TV/Google TV Box, or a PC, you need an internet connection to run the Kodi software. The Kodi Unable to Connect error says “This could be due to the network not being connected”. So, the next logical step is to check you have internet access and that it is functioning correctly.
This can be done by checking the Network Settings. Once you’ve confirmed a stable connection and verified that the URL is correctly spelt and operational, you can proceed to the final step, which will likely resolve the error.
4. Connect to a VPN
If you’ve exhausted all the solutions mentioned above and are still grappling with the Kodi Unable to Connect issue, a VPN is your best bet. At times, certain Internet Service Providers may obstruct access to Kodi addons or builds, and the sole workaround for these restrictions is a reliable VPN provider.
Using a VPN not only removes blocks or geo-restrictions, but it also provides a shield of security. It can keep you completely anonymous and protect your online data, ensuring it remains secure.
Unfortunately, not all VPNs meet the high standards that Kodi users require. This is why it’s crucial to be discerning. Since streaming often requires a significant amount of bandwidth, finding a trustworthy, quick, and secure VPN provider is of utmost importance.
Some VPNs maintain user activity logs and should be avoided, while others forbid torrenting.
I recommend NordVPN. It offers robust security features, lightning-fast speeds, and a dedicated Amazon Fire Stick app. In addition, you should be able to locate a suitable server with a network that spans more than 60 nations. Best of all, NordVPN offers a 30-day money-back guarantee, allowing you to test it out risk-free.
EXCLUSIVE NORDVPN DISCOUNT - SAVE 60%!!!
EXCLUSIVE NORDVPN DISCOUNT - SAVE 67%!!!
Wrapping Up
If you’ve been experiencing connectivity issues with Kodi, you’ll be pleased to know that following my tips can help you resolve the problem.
These tips are designed to ensure you can access Kodi without any annoying errors. With these steps in place, you can look forward to a seamless Kodi experience, free from any connectivity issues.
PROGRESS:






1 Comment
thank you so much wonderfull lady, I subscribe.